|
|
|
|
|

|
|
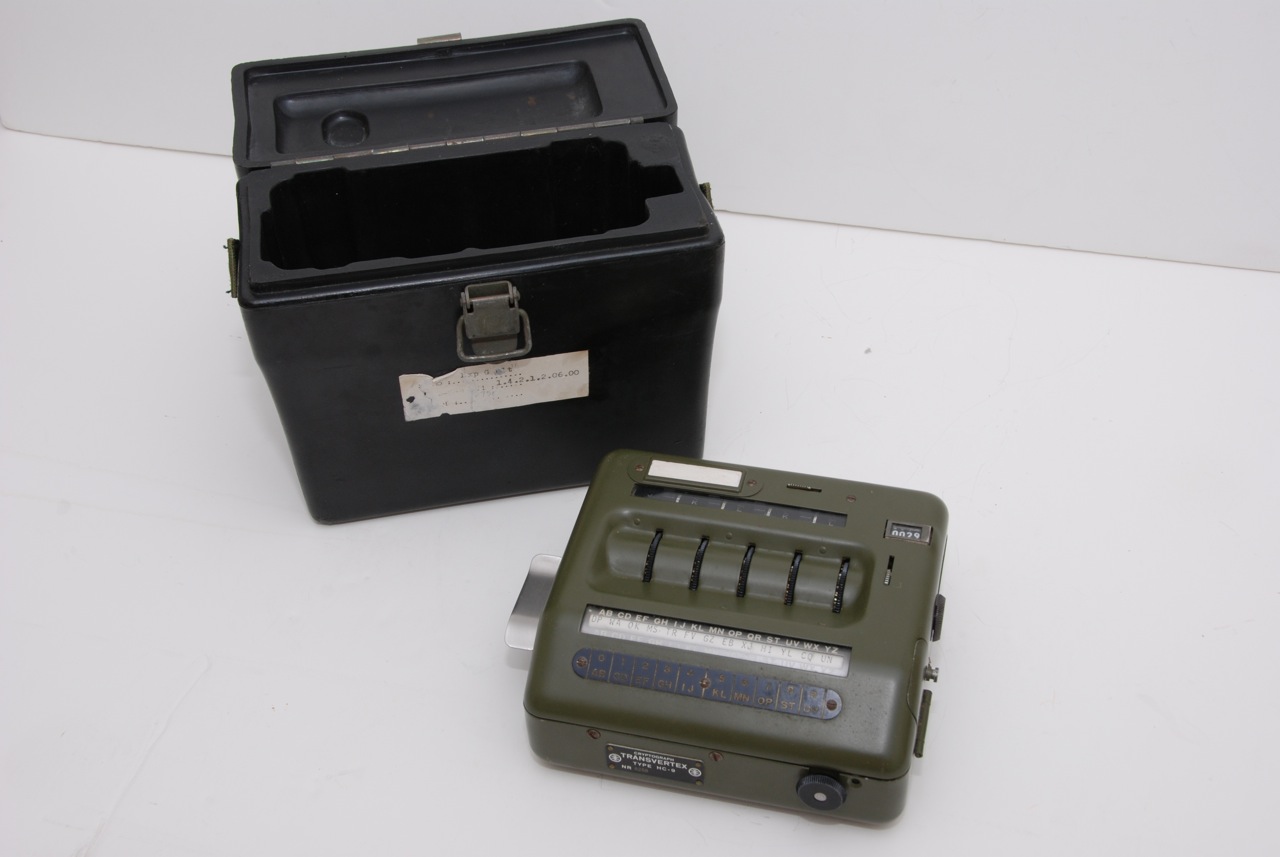
Pin-wheel Transvertex
Portable mechanical cipher machine
HC-9 is a mechanical cipher machine, introduced
in the early 1950s by AB Transvertex in Stockholm (Sweden).
It was developed from a 1940s design by company CEO
Vigo Waldemar Lindstein, for use by the Swedish Armed Forces
where it was known as KRYAPP 301.
It was also used in other countries, in particular in South America.
The HC-9 resembles the famous
Hagelin pin-wheel machines,
but features a different solution for manipulating the cipher wheel pins. 1
|
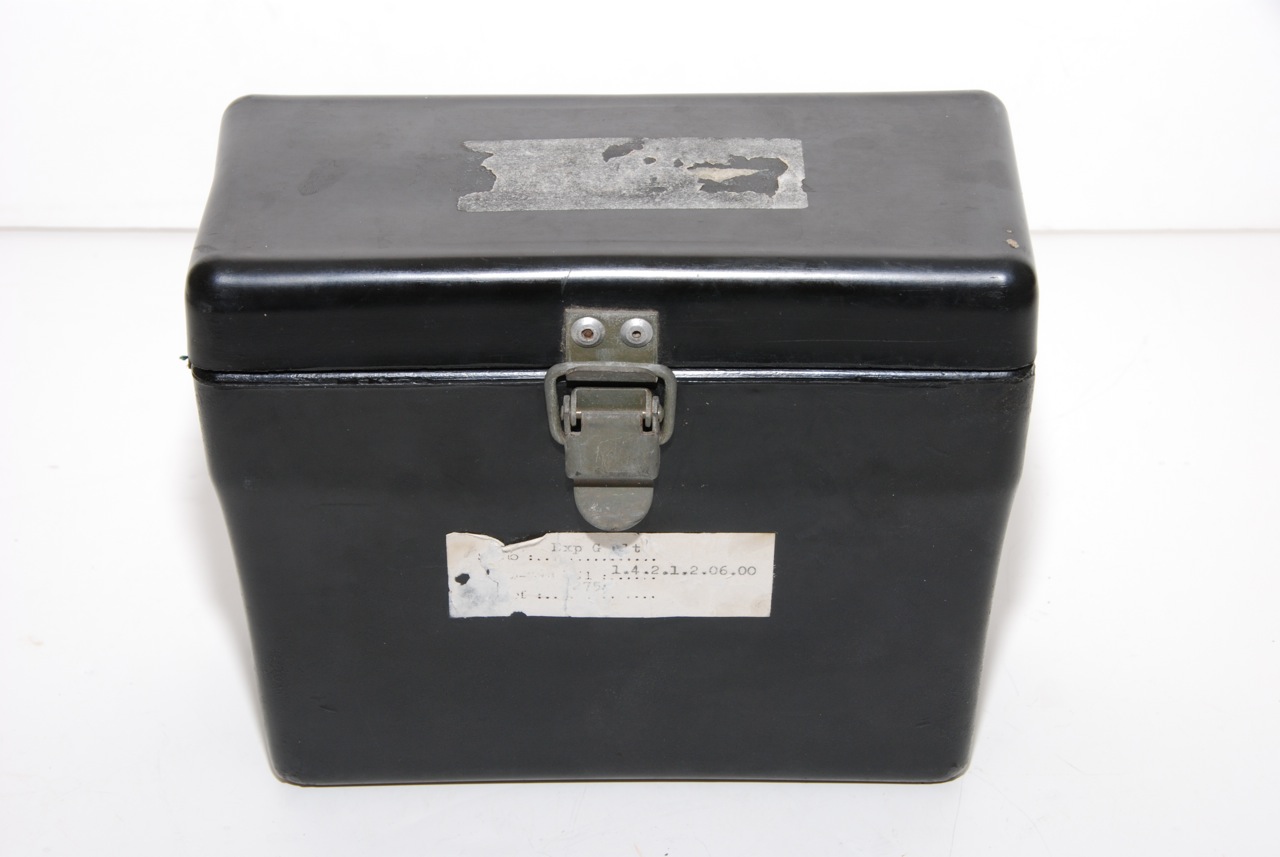
The machine measures 18 x 15 x 7 cm; and has roughly the same size as a
Hagelin C-36. For storage and
transport it was usually stowed in a water resistant black
rubber transit case.
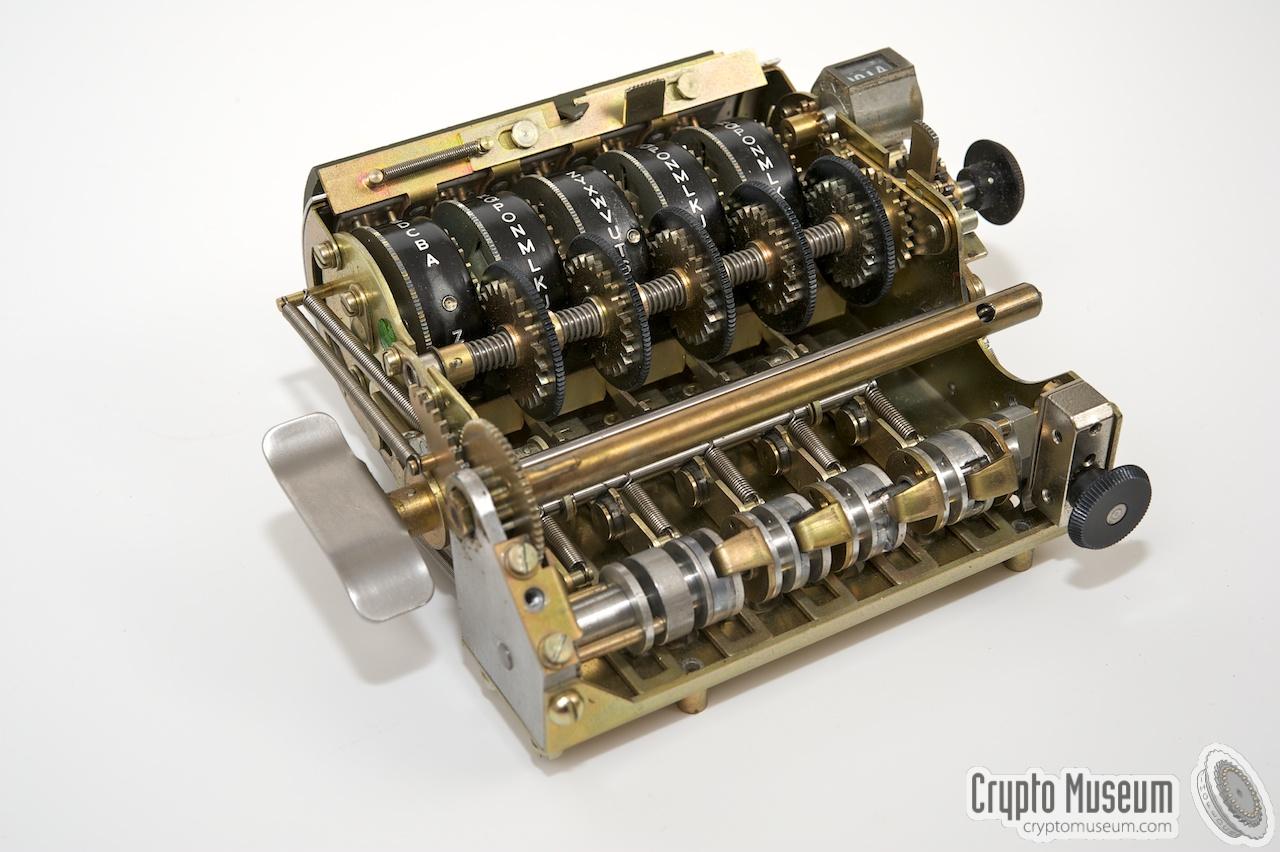
The machine has 5 cipher wheels that protrude the top, and a
revolving alphabet
that is visible through a window towards the front.
It is fully mechanical
and is operated by rotating a metal lever at the left side.
Like with the early Hagelin machines,
the movement of the cipher wheels
is controlled by pins, but unlike Hagelin, the pins of the HC-9
are not part of the cipher wheels.
|
|
|
On the HC-9, the pins are present behind a lid at the rear,
where they are manipulated, or programmed by means of a
punched card. The punched card
and the alphabet were
typically replaced every day at 00:00 hours, and special ones
were available for training purposes.
The HC-9 was intended for low-level tactical messages that had to
remain secret for several hours only, in the same vein as with the
Hagelin M-209.
It was first used by the
Swedish Armed Forces where it was known as KRYAPP 301. The machine,
together with key cards, procedures, documentation, etc., was part
of a crypto system called MGC which is short for Maskinkrypto
Gemensamt typ 'C' (Joint Crypto Machine Type 'C').
The system was evaluated and tested by the Swedish Armed Forces from 1959
to 1964 and was thereafter in regular use until 1994 [9].
|
-
Vigo Lindstein worked for Hagelin
prior to joining Transvertex, so it is quite possible that he developed
the ideas for the machine whilst working for Hagelin.
|
The image below shows a top view of the HC-9. The terminology used
in the description is quite different from the original machine
description released in the 1960s [5][6], but is more in line with
the terminology used with other cipher machines.
Towards the front is a window through which the alphabet drum is
visible. Immediately behind it are the five cipher wheels that
protrude the recessed part of the top cover. The current wheel
position is visible on a narrow window just behind the wheels.
At the rear is a curved door that gives access to the punched-card
reader.
|
|
Unlike the Hagelin M-209, the HC-9 does not
print the enciphered text directly to paper. Instead each letter has to
be translated by reading it from a window at the front of the machine.
Behind the window is a drum with 16 reciprocal alphabets. Depending on the
current cryptographic key, one of the 16 alphabets will be rotated into place
when the trigger knob is activated.
Setting the key, involves four steps:
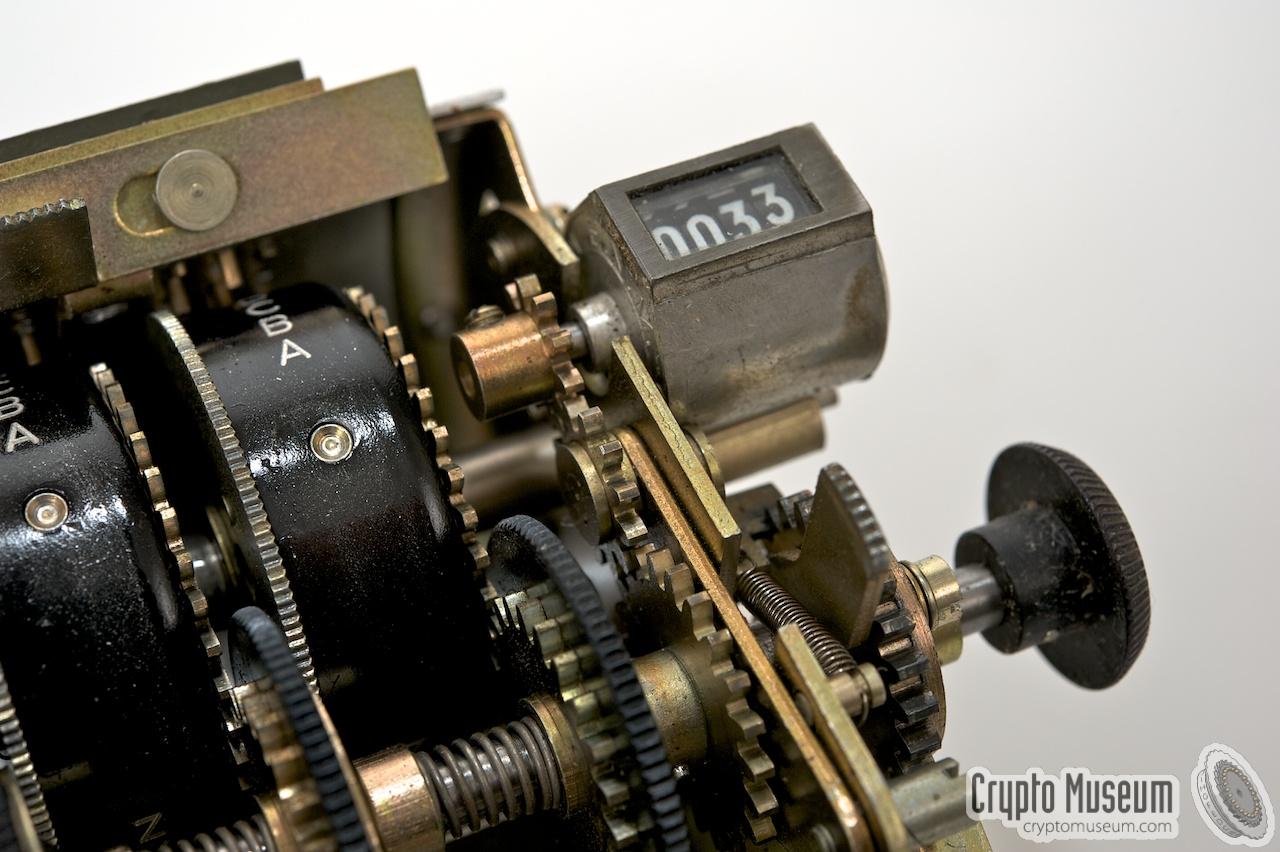
|
Before starting to encrypt or decrypt, the character counter (top right)
has to be zeroized. This is done by pushing a knob,
to the right of the wheels, towards the rear.
Whilst holding the knob in that position, turn the wheel
axle (black knob at the right side of the machine) until the counter reads
0000.
Then set the 5 cipher wheels
to the desired position (external key).
The randomized alphabet shown in the window, lines up with a fixed (ordered)
alphabet above and below the window. The alphabet is self-reciproke, which
means that the translation is reversable. Take for example the two red arrows
in the drawing above. Fixed letter I translates to
random letter S,
but fixed letter S
also translates to random letter I.
When encrypting a text, the trigger knob at the left has to be
rotated clockwise
and is then released.
One of the 16 alphabets will then rotate into place.
Now look up the first letter from the plain text on the fixed (ordered)
alphabet and write down the corresponding letter from the drum.
Next, activate the trigger knob, translate the second letter, etc.
Due to the reciprocal nature of the alphabets, decrypting is done in exactly
the same way as encrypting. After activating the trigger knob, the first letter
from the cipher text is looked up on the fixed (ordered) alphabet. Then write
down the corresponding letter from the drum. And so on, until the text is
deciphered.
|
Sending an excrypted message requires a number of steps to be taken [8].
First of all the internal key has to be set up. This requires a punched
card and an alphabet sheet to be fitted inside the machine. This can be
considered the daily, weekly or monthly key.
Next the operator randomly selects a 5-letter message key, e.g. VOMPF.
This key is unique for each message and has to be sent to the receiver
in encrypted form at the start of a message. This is done by setting
the machine to the daily key and entering the message key twice
(i.e. VOMPF VOMPF), which might result in something like DESKL BCSQP.
After zeroizing the counter, the operator sets the machine to his
chosen message key (VOMPF) and starts encrypting the message. Note that he
has to turn the trigger knob before encoding each new letter.
The encrypted text is written down in groups of 5 letters each.
The counter in the top right should be checked regularly to verify that
the 5-letter groups are still 'in sync'.
Numbers are converted to letters by using a conversion table attached to
the front of the machine. Two different letters can be used for each digit.
A group of digits is preceeded by 'KK' and terminated by 'ZZ'.
Each line is terminated by 'XX' (full stop) and the last 5-letter group
of the message is padded with 'Z' characters.
This best demonstrated with an example:
|
     To all units. The Operations will start at 15.30.
     Prepair for actions as ordered before.
|
|
First this message should be written down in 5-letter groups, without
spaces between the words and with 'XX' inserted in place of full-stops.
The time (15.30) is converted to letters (KK CLHB ZZ).
For example:
|
     TOALL OURUN ITSXX THEOP ERATI
     ONSWI LLSTA RTATK KCLHB ZZHOU
     RSXXP REPAI RFORA CTION SASOR
     DERED BEFOR EXXZZ
|
|
Once enciphered, this might look like this :
|
     DESKL BCSQP
     SCDRG ESASN OLWSG HGLGL UFAJB
     XILRB QPAJE OZWBP WJMDL BDYPR
     FNOST IPMLI OPKZZ YLVJX USERE
     UMSNG VNDWJ FEMYU
|
|
The fist two 5-letter groups ( DESKL BCSQP ) represent the
chosen message key (VOMPF ). The recepient must decipher the first
two 5-letter groups using the current daily key, which should
reveal the message key twice (e.g. VOMPF VOMPF ). The fact that
the two groups are identical is an indication that it was
correctly deciphered. The recipient then
sets his machine to the retrieved message key (VOMPF )
and deciphers the rest of the message.
|
Double encryption of the message key
Encrypting the mesage key twice at the beginning of a message,
should be considered a cryptographic weakness. It was also used
on the German Enigma prior to WWII,
and allowed the Polish cipher bureau to break it as early as 1932.
German cryptanalysts later described this procedure as
a faulty indicator technique [10].
Like the Hagelin M-209, the HC-9 has a number
of mechanical cipher wheels, each of which has a different number of possible
positions (i.e. the number of steps for a full revolution of that wheel).
In order to achieve the maximum cipher period (i.e. the number of steps before
the sequence repeats itself), the number of positions for the 5 wheels are
relative prime numbers. From left to right, the number of positions on each
wheel is:
29 31 33 34 35
As each wheel makes one step when a letter is enciphered, the total cipher
period is 29 x 31 x 33 x 34 x 35 = 35,303,730 steps.
Each wheel has a full alphabet around its circumfere. As the alphabet is
used only for 26 of the wheel's positions, the remaining steps are not
marked (i.e. are left blank). When setting the wheels to the daily key,
only the marked positions are used.
When a letter is enciphered, each wheel produces an active
or inactive code,
comparable to the presence or absence of a pin in a Hagelin machine.
In the HC-9 however, the pins have been replaced by a removable punched
card (see below). The operation is nevertheless identical.
The logic diagram below should help explaining the operation of the machine.
When activating the trigger knob, each wheel makes a single step.
For each wheel, the presence or absence of a hole in the punched card, then
produces a logical '1' (hole present) or '0' (absence of a hole).
The five bits from the wheels are then used in pairs to perform a (mechanical)
XOR-operation. XOR means that the output is only '1' when both inputs are
different. This results in a 4-bit binary number in the range 0000-1111.
The binary value is then converted to a decimal number (angle of rotation)
in the range 0-15. This is the number of steps counted back from 16.
The above principle is best explained with an example. The logical values
for this example are shown in red in the above diagram. Assume that at a
given position, the wheels produce the values 11101. When these 5 lines
are reduced to 4 lines, using pair-wise XOR, this results in the
binary value 0011.
This represents the decimal value 3.
When enciphering a letter, the trigger knob is first rotated clockwise.
This moves the alphabet drum to beyond alphabet 16. When releasing the
trigger knob, the drum stops at the count of three, i.e. at alphabet 13.
|
|
The HC-9 contains a drum with 16 reciprocal alphabets. When enciphering a
letter, the trigger knob is rotated and one of the 16 alphabets rotate into
place. The 16 alphabets are printed onto a small sheet of paper that is
wound around a drum which is accessible through a small door at the right
of the machine. Replacing the alphabet sheet is part of the cryptographic
key.
|
The entire machine was constructed in such a way, that alphabet sheets
(or strips) printed on a Hollerith machine could be used directly.
It was anticipated however, that alphabets could also be made by means
of other printing systems, such as a typewriter, with slight modification [5].
In later years, Transvertex suggested the use of the IBM 1401 computer for
the generation of randomized alphabets, and the complementary 1403 printer
for producing a suitable output directly on paper [7].
This computer could also be used to generate the randomized schemes
for the punched cards.
|
Alphabet sheets are 107 x 87 mm with the alphabets centered on the page.
The alphabets themselves are typeset in a 12pt monospaced font, such as
Courier, OCRB or the original Hollerith font. Creating such alphabets on
a standard typewriter is rather straight forward as the default letter
spacing should match the HC-9. Vertical spacing may need some
experimenting.
The image above shows a suitable alphabet sheet. It is a reproduction of
an original alphabet sheet from the Crypto Museum collection.
The top line contains the identifier (BUMNP). The first alphabet is marked
with a '*' at either side. Also note the horizontal index lines at either
side of alphabet 8. These lines should line up with the white index lines
on the drum. Below is a standard sheet that was used for training. It
is printed on green paper and is marked TOTAL 1 - UTB 2 .
The text at the bottom right – Meddelande krypterat med denna nyckel
får ej signaleras – means Messages encrypted with this key should
not be transmitted. To the left of this text is the stamped key indicator
CACKB. Note that both left corners of this alphabet sheet are cut off.
Together with the green paper colour, this is done to indicate that this key
is for traning only.
Click the image to the sheet as a printable PDF file.
The alphabets are presented in two different typefaces:
a new and an old (used) version of Courier.
Print the file onto faded (yellow-ish) paper,
cut it out
and fold it around the drum.
Once installed in the machine, the alphabet may have to be aligned
somewhat by means of
the black knob on the front of the machine.
|
 |
-
TOTAL = Totalförsvaret (Swedish National Defence).
-
UTB = Utbildning (Training).
|
|
Like the early Hagelin machines,
the HC-9 belongs to the class of pin-and-lug cipher machines.
The presence or the absence of a pin at a certain position
on a cipher wheel, determines the state of that wheel as part of the overall
complex mechanical encryption algorithm.
|
On Hagelin machines, such as the M-209,
the user needs to set the pins of each wheel to a desired state by using
tweezers. This is a time consuming process with much room for error.
On the HC-9, a punched paper card is used instead of the pins. The
card is placed behind a door at the back of the machine (shown here).
The card compartment is opened by
releasing a slide switch
on top of the machine.
The image on the right shows a typical HC-9 machine with the card
compartment open. To avoid mistakes, the card can only be inserted in one
way.
|
|
|
Three guide holes should each mate with a fixed guide pin.
When a letter is enciphered, each wheel makes one step. For each position
of a wheel, it senses the presence or absence of a hole in the punched card.
The punched card is therefore divided into 5 segments, as shown here:
The card is shown when looking at the device from the rear. This means
that wheel 1 is at the right and wheel 5 is at the left. The letters A-Z
correspond with the alphabet on the circumfere of the wheel. The varying
number of blanks are here replaced by numbers (starting with '1').
The original cards were made from 70 mm wide paper rolls supplied by IBM.
The rolls had a diameter of 400 mm and contained 3000 pre-cut cards.
Transvertex supplied a small hand-operated card puncher,
that allowed 120 cards to be punched per minute.
The puncher also contained a built-in printer that could be used to print
date, time, purpose and serial number directly onto the card.
Each puncher came with two inserts, in order to reduce down-time whilst
setting up a new punch scheme [7].
|
A card is made from rather thick paper of, say, 250 grams and is exactly
100 x 70 mm in size. A cut-off corner marks the top left. Three guide
holes (two at the bottom and one near the top between segment 4 and 5)
are used to ensure correct positioning of the card. Each sensing pin has a
diameter of 1.5 mm, but the holes are all 3 mm to allow for tolerances.
The image below shows the layout of a fully punched card. It can be used
as a mask when creating your own cards for the HC-9.
Click the image to the
mask as a 100% PDF file. Print the page on 200 or 250 gram paper and punch the
holes as required.
The cards were punched by a machine that also printed the identity and
the serial number on it. The stars have no meaning and were probably
pre-printed on the paper. They might have been used for alignment of the
machine though.
Below is an example of a set of cards that was used for traning purposes.
For that reason they are marked TOTAL 1 - UTB 2 .
The identity was printed between segments 2 and 3. In this case the identity
is TOTAL-UTB NR 2. The serial number is printed between segments 3 and 4.
The card on the left has serial number 5882, whilst the one on the right bears
the number 5883. They are otherwise identical. Click on the image to download
the cards as a PDF file.
|
|
-
TOTAL = Totalförsvaret (Swedish National Defence).
-
UTB = Utbildning (Training).
|
|
The HC-9 is a true marvel of mechanical engineering. Although much of its
principles are based on the knowledge of Hagelin machines of the same era,
the mechanical construction of the HC-9 is completely different. Apparently,
the designer had to circumvent the existing Hagelin patents, whilst at the
same time trying to make the operation simpler, by avoiding the use of
pin-wheels.
|
The image on the right shows the interior of the HC-9 after its green case
has been removed. The
five large black cipher wheels
are clearly visible towards the rear of the machine.
The card reader is placed directly behind the cipher wheels.
The most ingenious part of the machine is located at the front, just below
the alphabet drum (which has been removed here).
The construction at the front
is a series of clever couplings
that perform the action of the four XOR
mechanisms as well as the conversion into a rotation angle
(check the logic diagram above).
|
|
|
Don't be fooled by the seemingly simple construction of this machine.
Especially the coupling mechanism at the front (called the 'adder')
demonstrates the ingenuity of the designer Vigo Waldemar Lindstein.
More detailed images of the interior of the HC-9 can be found below.
Click any of the thumbnails for a closer look.
|
7 December 2012
Ukrainian programmer Vyacheslav Chernov (Чернов) has made a beautiful
graphical HC-9 Simulator for Windows TM.
The image on the right shows the main window of the program.
All items can be clicked, and the wheels can be moved forward
and backward. Both the alphabet ruler and the punched card
can be fully edited.
➤ Download HC-9 Simulator
➤ Instructions
|
|
|
- Ralph Simpson, Transvertex HC-9 Cipher
Good description of the working principle and operating procedure.
- Cipher A, Deavours and Louis Kruh, The Swedish HC-9 Ciphering Machine
Cryptologia, Volume XIII, Number 3, July 1989, pp. 251-265.
- Deavours and Kruth, The Swedish HC-9 Ciphering Machine Challenge
Cryptologia, Volume XIV, Number 2, April 1990, pp. 139-144.
- H.P. Greenough, Cryptanalysis of the Swedish HC-9: A Known-Plaintext Approach.
Cryptologia, Volume XXI, Number 4, November 1997, pp. 353-367.
- AB Transvertex Stockholm, Hand-driven cipher machine type HC-9
Brief description of the HC-9 (English). Publishing date unknown.
Transcribed by Crypto Museum, 6 January 2012.
- AB Transvertex, Ciphering Machine HC-9 - Operation
Operating instructions and spare parts list. 25 August 1967.
Transcribed by Crypto Museum, 6 January 2012.
- AB Transvertex, HC-9, Handgetriebenes Chiffriergerät
8-page brochure (German). Publishing date unknown, but later than [6].
- AB Transvertex, Operation Manual for Ciphering Machine HC-9
10-page user manual (English). Publishing date unknown, but later than [7].
- Lars Holmgren, Personal correspondence
Retrieved May 2015.
- Wikipedia, Enigma machine — Indicator
Visited 19 October 2021.
|
|
|
|
Any links shown in red are currently unavailable.
If you like the information on this website, why not make a donation?
© Crypto Museum. Created: Thursday 06 August 2009. Last changed: Sunday, 23 April 2023 - 10:25 CET.
|
|

|
|
|


![Pin layout of the punched card [8]](svg/hc9_card_order.svg)


